Wire wrapping


Art and Space: The Studio

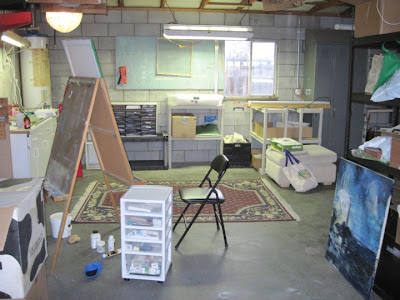
The hardest part of being an artist is all the stuff. I love my stuff. I need my stuff. This becomes a problem when you live with someone. When I lived alone, my dining table was covered in art projects and supplies and the walls surrounding it were covered in sketches in the manner of a stalker. Paintings were drying on the balcony, paintbrushes littered the bathroom sink. Unfortunately, most artists can't afford to live alone, or fortune smiles on us and we find ourselves not alone. So, the stuff suddenly becomes a burden to the roommate/partner/husband/wife. There are ways to get around this. If you have the extra space, it's always good to dedicated it to art. If not, there are some tricks.
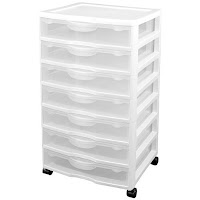

Get plastic drawers.
I swear by these suckers. You can get them at any department store like Walmart, Kmart and Target. I found one of mine next to a dumpster (along with the biggest canvas ever!) I think they're better than bins since there isn't so much space that you overfill and can't find anything. At the same time, they come in a lot of different sizes to fit your big and little needs.

Dedicated Space

Let's face it, you are going to need to leave something out. Be it drying media or gremlins made time go faster, something will need to stay out. Have a somewhat orderly space for this. Pick somewhere out of the way like the counter in the second bathroom or a small table in the corner. Give yourself a break, never expect to be perfectly clean.

Get in the Closet

Have a walk-in closet? Instant studio space! I've never tried this, but my mother is giving it a go. If you don't have a lot of clothes, or you use a dresser, why not use your closet as a tiny art room? You can remove the coat racks from the wall and suddenly you have elbow room. Sure, it's cramped, but then no one will want to come in there to bother you.

Go outside

Okay, not every artist lives in New Mexico (although, it seems like you can't swing your bag without hitting one) but if the weather is good, the yard or the balcony can be a good place, weather permitting, particularly for painters.

Get a Room

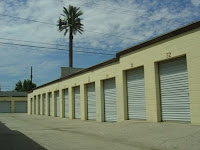
If you have extra money, a studio space might be worth it to you.
There are some self-storage facilities that have climate control, and may be more cost-effective. Keep in mind that if you sell, you will likely need to sell elsewhere, your self storage security might not be amused.

Friends with Space

I have finally lucked out with my art-making space. My partner bought a house with a separate two-car garage that is mine - ALL MINE!! However, I didn't immediately forget the trials of being an artist, so I share my space with a fellow artist (although, this roommate doesn't need me to be clean). Sharing a space with someone who has similar needs definitely helps. Find someone who will share a corner of their garage, or who will split a studio space with you. Or get lucky, like me ;)


Student Work

The most beautiful thing in the world to me is not my art, but the art that my students make.

Here are some examples from my jewelry students that I am very proud of (posted with permisssion):


Be an Artist Teacher Not an Art Teacher

I recently got a job teaching art. I teach jewelry at a High School and I've noticed a few interesting facts about teaching.

1. They love boundaries. If you make them get a tardy slip from the office every time they're late, they like you more. If they know that they are allowed to go to the bathroom, they won't ask for a pass as often.

2. If you are nice to them, they'll be nice to you.

3. Most kids in high school are not afraid of fire unless they have actually been on fire.

4. Everything you say is a reference to sex.

5. When you become an art teacher, you can kiss your own art goodbye.

Number 5 is probably somewhat of an exaggeration, since I do create some class examples. But it isn't quite the same. Just like any job, you don't take it home if you can help it (which is nearly impossible as a teacher) and thinking about it brings you back to thinking about the kids. So this leaves me to ponder making art and trying not to think about the theft, the vandalism and the attitude, but trying to think of the handful of excited students who will become wonderful artists or wonderful artistic people. Hopefully, when I think of making art again, I will have paper before me and a pen in my hand and no thought in my head.

Travel Art Kit

I get my best work done while I'm away from home. Unfortunately, I like using watercolor and it gets a bit messy. I could use watercolor pencils, and I do, but sometimes they don't quite do what I want them to.

An alternative to the messy and embarrassing fiasco of bringing all of your paints to your local coffee shop, you can make your own watercolor kit out of an Altoids tin.

I can't take credit for this brilliant idea. Here is the link to the Instructables Site where I found it. However, I will take credit for improving on it.

Supplies: Altoids tin, paper clay, acrylic varnish

Clean out the Altoids tin. Soap and water. Better to be safe than sorry since wet sugar can attract nasty critters.

Here is the improvement: Paper Clay.
Paper clay is made of volcanic ash, talc, water, starch, wood pulp, preservatives and fairy magic. This stuff doesn't require baking, yet it dries hard.

Mold the paper clay into little holes for your watercolor paint. I smoothed out the cups with the butt of a Sharpy marker. I only made eight. You could probably make ten, like the brilliant JP from instructables, but I lack the clay molding chops for that sort of endeavor.

Let the tin dry. I actually forgot about it for a few days and it dried quite nicely. Consult the package for the minimum drying requirements. If you live in a humid climate, I suggest trying my tactic.

After your watercolor tray is completely finished drying paint on several coats of acrylic varnish. I used three coats over several days. Again, consult the minimum dry-time instructions on the label of your product since most of you are probably not as absent-minded as I.

The next step is to simply fill the holes with your watercolor tubes. I used primary colors and burnt sienna plus its relatives. I figure this is a personal decision.

Now that you have your watercolor kit, you can always go back to Instructables to make the $1 Waterbrush. I however lost patience and bought an $8 waterbrush at my local art store.

Enjoy!

Sketches


Monotype Madness!

Sometimes all it takes is a little motivation from a class.

I signed up to take a class in Monotype printmaking at the New Grounds Print Workshop and Gallery in Albuquerque, NM. If you have never been there, I highly recommend it. The workshop and gallery are in the same space, making it an interesting change from simply viewing finished and framed art in a normal gallery. Here you get to see the amazing process of printmaking by inky, cursing artists.

I was happy to have access to ink, brushes, brayers and press time, but the two hours allotted for the entire process just wasn't enough. Luckily, my instructor generously stayed an extra half-hour to help me finish.

The ship has several layers of ink. Some of these higher end inks have a translucent quality, so mixing inks on a pallet isn't necessary and often not recommended.

I created the palm tree in two runs on the press. I rolled on yellow ocre and subtracted and added ink with a brush. The second run was simply a bright yellow plate with a few fronds subtracted to get some of the highlights.

Now, off I go for a cherry blossom visit in Washington, D.C.!

Coming soon: How to make your own nifty-wifty travel art kit.

Change

A complete change of weather by a band of Yellow blowing through like a rain curtain made of frosted glass, blowing through an open weather door, letting in chilly air angering warm-blooded artists painting masterpiece after masterpiece. Disrupted papers flap their pages like an unrefined 'hello!' Distant mountains mellowed by frost, ruined by a lying barista for at least ten seconds until the next round of coffee is served. Boisterous name calling tempered by nervous new acquaintances: powered by the wind, propelled by the mind. Uniformly underutilized study-time; an active participation in the realm of Self-Help and the realization of the non-existence of the Dalai Lama. The clock continues to spin slowly out of control, counting numbers up to twelve until time is reset and I am wrong again. Saffron. Indiscriminate conversation: the giving and the taking in word-to-word combat. Listening then speaking until the hands spin and the time resets too many times to remember.

Painting water with water

Gouache and watercolor.

I seriously have a problem finishing with these two mediums. I always wonder, "is this unfinished? Is this my style?" I think back to some of my studio training where I was told over and over:

Never Outline. Ever.

So, for a very long time, I stopped outlining and my professors became happy at how much like them I had become. Now I am grateful for these lessons, I am able to render a drawing as well as the next artist.

However, somehow I never had lessons in watercolor, so my need to outline everything is unavoidable. Is this my style? Or is it just amateur? I will ponder this as I take my brush pen and outline some bricks.

Hiatus: Finding my way through writing

To Understand a Destination, Plot the
Point of Origin
In a Roadmap to a Specific Place
Triangulate
Using Specific Postitions with The Limited Compass
Within Specific Intervals of Time
Gridmarks Plotted, Timeline Measured-Proceed
Without Caution
An Objective, a distinguished Element
Counted, Rated, Measured
An Extension of Place, a Method of Knowing
Transmitted through Thought and Paper
Surveyed and Traced-Observed and Navigable
Deluded by Time